 You probably had heard a lot about the importance of deep linking inside a blog. Be it for SEO reasons, or from the desire to increase the number of pages per visit, it is good to link to your old posts. We all know how much time we spend on deep linking: search for the desired post, copy the permalink, include it in the current post… or let WordPress do it for you, by using the aLinks plugin. You just indicate the desired keywords, and aLinks does a search within all posts, chooses the most relevant one and creates a link to it each time your keyword string appears on a page.
Another benefit of aLinks is that it makes Amazon affiliate links very easy: you input your affiliate ID and the keywords, and your links are built automatically.
I found it very easy to install and to set up. It is active and working in this very moment and you’ll never guess which links I built manually and which links were built by aLinks.
Use it once and you’ll never want to live without it again. It is the same feeling I had when I got my first pair of born shoes and my best hot kicks: no matter how many other fancy sandals, shoes or boots I bought after that, my Born shoes were always on my mind.
Read More...


- Find out what I'm doing, Follow Me :)
Blog Deep Linking Made Easy: aLinks WordPress Plugin
Browser tips
Keep the zoom button pressed to set the display/font size that you are comfortable with. I use the trackball a lot with the browser set to landscape mode. It allows you to browse with out opening the keyboard. The menu keys proximity to the trackball makes browsing easier.
If opening the keyboad to browse is your thing, you can use alt+scrollball to fast scroll.
Double touch an area on the browser and the page centers to that area.
Click shift button and use the scrollball to select an area starting with the cursor.
Use Menu+X to Cut, Menu+V to Paste in text fields. Oh, Menu+C is copy.
New windows can be set to open in the background so that you don’t have to look at loading screens. Long press trackball on a link to see more options for that link, including open in a new window.
Doubleclick on the trackball twice to show the entire page and the magnify too.
Use google reader!
Read More...
Watch over 25k music videos, from Justin Bieber to Lady Gaga
Over 25k free music videos from 7,500 artists are now available within the new Android app.
Youtube app now supports VEVO’s music videos too. Just search for “music” in the new app.


How to make your iWeb site’s background
Having a large image or photograph as background is very ‘in’ at the moment when it comes to modern web design. A problem arises however, when you try to achieve this style in iWeb. Inspector only allows you to set a tile or centered image that will move when a user scrolls the page. This obviously isn’t what you want when you have your most beautiful image as a backdrop for your home page.
To get round the problem all you have to do is a tiny little bit of code editing (and I do mean tiny) before you publish your site and you will be able to keep the background of your iWeb page static whilst scrolling the content.
One of the more painful decisions you will have to make is which image to use and how big to make it. Obviously different people have different monitors – yes the world would be a better place if everyone owned a new 27″ iMac!
Using an image that is too small will result in white lines to the bottom and right of the background image depending on what size resolution your site visitor has. If the image is too big then obviously it wont all be seen. I personally would use an image that is roughly 2000px wide by 1200px high but you don’t have to stick to those measurements; testing is the key!
You will now have to select an iWeb theme that is ‘empty’ such as White. The reason for this is that some themes have a separate image for the footer section of a page and so setting the page background to ‘none’ as you will see, will still leave an image in the footer (try it on Darkroom and you will see what I mean).
So, as I mentioned above, choose the White theme and open ‘Inspector’. Set the page background to ‘None’ and the browser background to ‘Image’. Browse to where you have saved your image and select it. If you have used a suitably large image you don’t have to bother about setting the tile option, but if you have any doubts go on the side of caution and select ‘Tile’.

Once you have completed adding all of the iWeb page’s content you now have the option to either publish to a folder (or MobileMe) as it is or to make the content stand out a bit more, add a shape from the shape menu behind all of the content and make it transparent in Inspector. I recommend using a setting of less than 50% . It is not necessary to add the shape and in reality will only serve to slow down the loading time of your iWeb site, the choice is yours and depends entirely on what image you have set as your browser background and how legible your content is.

By now you will have (either with or without a transparent shape) an iWeb site published to a folder, be it on your hard drive or on your iDisk.
It’s now time to start editing the HTML code so navigate to the folder on your hard drive (or iDisk) where you published your iWeb site. Find the first page you created in your site and right-click (Ctrl-click) on it and select ‘Open with’. Then when the drop down list of applications appear choose your HTML editor of choice.

Once again I recommend the free application TextWrangler from bare Bones Software.
Select Cmd+F on your keyboard and enter ‘no-repeat scroll’ into the ‘Find’ window that pops up.

Hit return and the phrase ‘no-repeat scroll’ will appear. Now all you have to do is replace the word ‘scroll’ with ‘fixed’. That’s it.

Do that for every page on your site and then save everything. You can now publish your site to your web host via FTP, or if you are a MobileMe user you have already finished.
Visit your web-site to check out the new non-scrolling background. I personally think this is a fantastic technique for photographers or artists who wish to display their work, a different image or photograph on each page would look stunning.
Have you used this effect on your iWeb site? Leave a comment and let us take a look.
Read More...
Membubuhkan Warna Themes Pribadi di Ponsel WP7 HTC
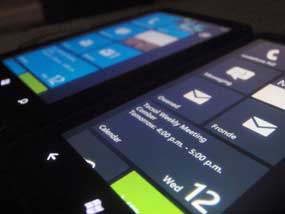 Forum Xda-Developers telah berhasil membubuhkan themes pribadi dalam ponsel Windows Phone 7 (WP7) HTC. Metodenya cukup mudah, dengan mengedit registry pada bagian pre-config tertentu, dalam hal ini warna.
Percobaan yang telah mereka lakukan adalah mengubah warna themes sesuai kehendak pengguna, diluar warna-warna default. Trik editing registry berikut dipaparkan oleh salah satu member bernama 'Xboxmod'. Namun segala sesuatu yang telah dilakukan, resiko ditanggung pengguna.
Berikut adalah langkah-langkahnya:
1. Untuk memulainya, pastikan HTC Connection Setup telah diinstal terlebih dahulu. Aplikasi ini dapat dicari di 'HTC Apps' dalam Marketplace. Bagi yang belum bisa melakukan unlock, anda harus butuh seorang developer untuk melakukannya. Gunakan saja ChevronWP7. Jika sudah, install TouchXplorer ke ponsel WP7.
2. Buat tiga jenis registry edit seperti di bawah ini. Berikut adalah contoh untuk merubah warna themes dari pink ke biru.
File Pertama:
REGEDIT4
[HKEY_LOCAL_MACHINE\ControlPanel\Themes\0\Accents]
"0"=dword:FF339933
"1"=dword:FFE51400
"2"=dword:FF1BA1E2
"3"=dword:FFF09609
"5"=dword:FF0066FF
"6"=dword:FF292a30
"7"=dword:FF8CBF26
"8"=dword:FF00ABA9
"9"=dword:FFA200FF
"10"=dword:FFFF0097
File Kedua:
REGEDIT4
[HKEY_LOCAL_MACHINE\ControlPanel\Themes\1\Accents]
"0"=dword:FF339933
"1"=dword:FFE51400
"2"=dword:FF1BA1E2
"3"=dword:FFF09609
"5"=dword:FF0066FF
"6"=dword:FF292a30
"7"=dword:FF8CBF26
"8"=dword:FF00ABA9
"9"=dword:FFA200FF
"10"=dword:FFFF0097
File Ketiga:
[HKEY_LOCAL_MACHINE\ControlPanel\Themes\AccentsDisp layName\0409]
"0"="Green" ;
"1"="Red" ;
"2"="Blue" ;
"3"="Orange" ;
"5"="Pink" ;
"6"="Brown" ;
"7"="Lime" ;
"8"="Teal" ;
"9"="Purple" ;
"10"="Magenta" ;
3. Save ketiga notepad diatas dengan ekstensi '.rgu'
4. Gunakan tool dalam RAR berikut bernama 'rgu 2-xml.exe' untuk mengkonversi salah satu file tersebut.
5. Ganti nama file menjadi 'CustClear.provxml'
6. Gunakan tool kedua dalam RAR bernama 'XBMOD.Files.Deployer.exe' untuk membuat file XAP dalam ponsel.
7. Jalankan XAP file dalam ponsel, menggunakan developer tools.
8. Jalankan aplikasi, kemudian buka TouchXplorer dan cari 'MyRingtones' dalam 'My Document'. Copy file yang ada di sana.
9. Paste file ke direktori \Windows
10. Jalankan HTC Connection setup. Themes sekarang telah ditambahkan.
Selamat mencoba!
Read More...