Having a large image or photograph as background is very ‘in’ at the moment when it comes to modern web design. A problem arises however, when you try to achieve this style in iWeb. Inspector only allows you to set a tile or centered image that will move when a user scrolls the page. This obviously isn’t what you want when you have your most beautiful image as a backdrop for your home page.
To get round the problem all you have to do is a tiny little bit of code editing (and I do mean tiny) before you publish your site and you will be able to keep the background of your iWeb page static whilst scrolling the content.
One of the more painful decisions you will have to make is which image to use and how big to make it. Obviously different people have different monitors – yes the world would be a better place if everyone owned a new 27″ iMac!
Using an image that is too small will result in white lines to the bottom and right of the background image depending on what size resolution your site visitor has. If the image is too big then obviously it wont all be seen. I personally would use an image that is roughly 2000px wide by 1200px high but you don’t have to stick to those measurements; testing is the key!
You will now have to select an iWeb theme that is ‘empty’ such as White. The reason for this is that some themes have a separate image for the footer section of a page and so setting the page background to ‘none’ as you will see, will still leave an image in the footer (try it on Darkroom and you will see what I mean).
So, as I mentioned above, choose the White theme and open ‘Inspector’. Set the page background to ‘None’ and the browser background to ‘Image’. Browse to where you have saved your image and select it. If you have used a suitably large image you don’t have to bother about setting the tile option, but if you have any doubts go on the side of caution and select ‘Tile’.
Once you have completed adding all of the iWeb page’s content you now have the option to either publish to a folder (or MobileMe) as it is or to make the content stand out a bit more, add a shape from the shape menu behind all of the content and make it transparent in Inspector. I recommend using a setting of less than 50% . It is not necessary to add the shape and in reality will only serve to slow down the loading time of your iWeb site, the choice is yours and depends entirely on what image you have set as your browser background and how legible your content is.
By now you will have (either with or without a transparent shape) an iWeb site published to a folder, be it on your hard drive or on your iDisk.
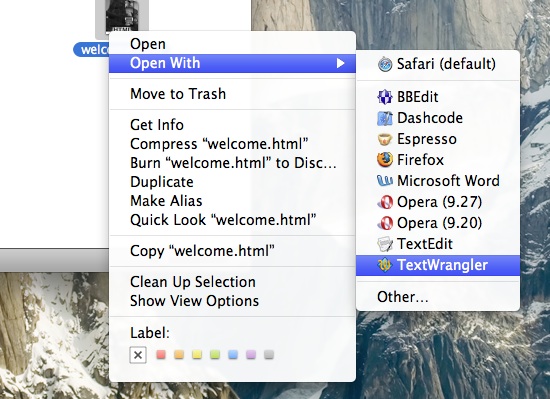
It’s now time to start editing the HTML code so navigate to the folder on your hard drive (or iDisk) where you published your iWeb site. Find the first page you created in your site and right-click (Ctrl-click) on it and select ‘Open with’. Then when the drop down list of applications appear choose your HTML editor of choice.
Once again I recommend the free application TextWrangler from bare Bones Software.
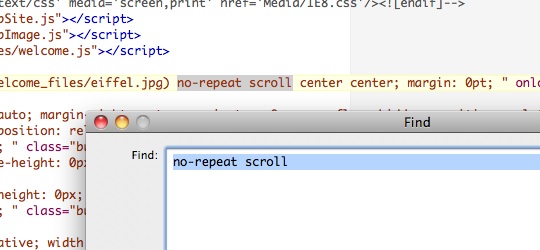
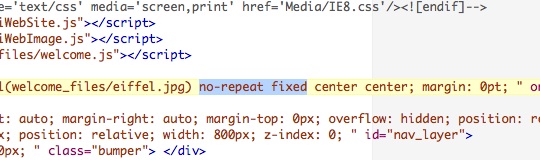
Select Cmd+F on your keyboard and enter ‘no-repeat scroll’ into the ‘Find’ window that pops up.
Hit return and the phrase ‘no-repeat scroll’ will appear. Now all you have to do is replace the word ‘scroll’ with ‘fixed’. That’s it.
Do that for every page on your site and then save everything. You can now publish your site to your web host via FTP, or if you are a MobileMe user you have already finished.
Visit your web-site to check out the new non-scrolling background. I personally think this is a fantastic technique for photographers or artists who wish to display their work, a different image or photograph on each page would look stunning.
Have you used this effect on your iWeb site? Leave a comment and let us take a look.
Read More...


- Find out what I'm doing, Follow Me :)
How to make your iWeb site’s background



Custom accordion slider for your iWeb all in CSS3
Continuing in the vain of adding CSS3 bits n’ pieces to iWeb in an effort to bring it up to date I have been working on something that uses the new ‘transition’ elements taken from the new version.
This week I would like to show you how to insert a custom accordion style slider into your iWeb sites. These are becoming particularly popular at the moment as they are something that you can place on your homepage, without taking up too much space, but it still allows you to give a bit of information about your other pages.
The full code is attached at the bottom of this post and, as with all of the other CSS3 posts I have produced so far it is fully customizable. I picked the gray gradient because I thought it looked ‘Appley’ but you can use anything you want. You don’t even have to use a gradient if you don’t want to.
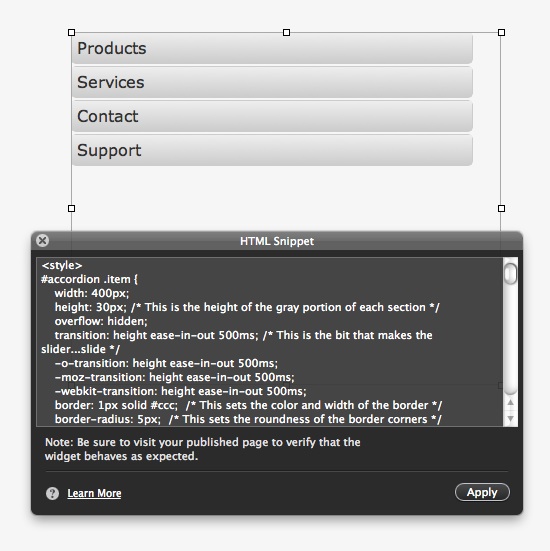
Of course the font can be changed to fit your site too as can the number of different elements. You can see from the image below that I have chosen 4, but with a bit of copy/pasting within the code you can have as many as you like.
And as you can also see from the image above, you can do all this with a HTML Snippet; I told you you can do pretty much anything.
So what does this accordion slider do?
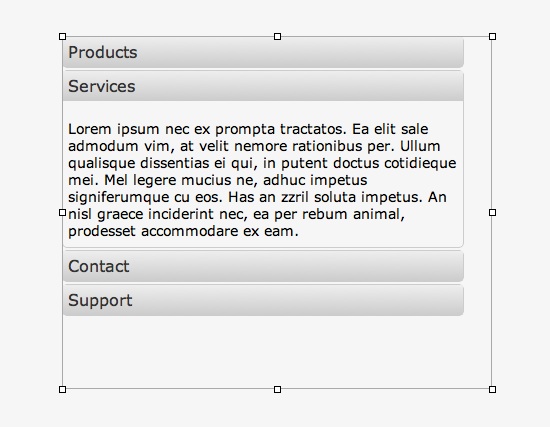
As you slide your mouse cursor over each gray element a box slides down from underneath it giving your visitor a bit more information about the subject heading. Take a look at the screenshots below to see what I mean.
All you have to do is download the code from the link below, paste it into a HTML Snippet within iWeb and click ‘Apply’. You will have to make sure that you drag the bottom-middle handle down so that the scroll action will fit, it is trial and error, but it does work.
I have commented up the css explaining a little bit about which bit does what and helping you to change elements. You may even want to refer to my previous post about on-line CSS3 tools to help you pick new gradients or borders to suit your site (or even match your CSS3 buttons….)
Download the css3slider file
Have you used this or other CSS3 elements in your iWeb site? Leave a comment and let us take a look.
Read More...

How to add a Facebook Like button to your iWeb site
I have been meaning to do this tutorial for quite a while now but never got round to it. I am sure once you find out how easy it is to do you will be amazed that you didn’t try it sooner.
Unless you have been living in a cave somewhere in the middle of nowhere for the last 8 years you will know that Facebook is the second most popular web-site on the face of the planet after Google. With that sort of pulling power it seems almost ridiculous not to include a Facebook ‘Like’ button on your web-site.
So how do we go about adding a button to our iWeb sites? Simple! To begin with you will need to point your browser in the direction of the Facebook Developers page regarding Social Plugins.
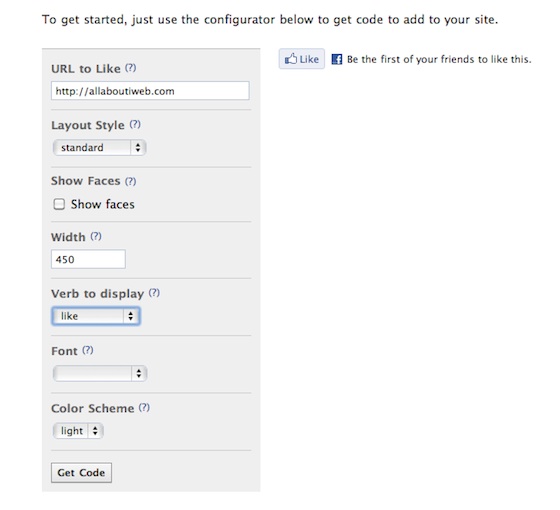
Once there, scroll down a bit and you will see a long gray rectangle containing various elements that you will have to complete and an example of how your button will look.
Fill in the relevant boxes, starting with the page URL you want to add the button to. You can of course just add your site’s URL and only get the code once, else you will have to get the code for every page you add the button to.
Next choice to make is which layout you want for your button. There are three to choose from, Standard, Button Count or Box Count; pick one that suits your site.
You now have the option to show faces (of the people who click your button) along with the width of the button.
Next up you get to choose whether you want ‘Like’ or ‘Recommend’ on your button, followed by the font and finally a light or dark color scheme.
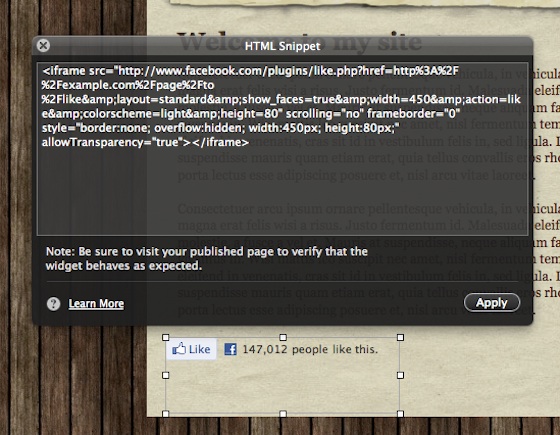
Once you have decided, click the ‘Get Code’ button and after a short while a pop-up window should appear with two types of code in it.
You want the top bit – or the ‘iframe’ portion – of the the code so select it all and then hit Cmd+C to copy it.
Now it’s time to open iWeb and navigate to the page and area where you would like your button to appear.
Drag in a HTML Snippet and paste in the code you just copied; click ‘Apply’ and your button should appear. It won’t work just yet though as you have not published the page.
To test your button works publish your site to a folder, view the site and the navigate to the page with the button. When you click on it your will be presented with a pop-up window containing the Facebook login box.
And that is all you have to it. I told you it was easy. If you want to add a new button to your iWeb site, for example each time you publish a blog entry, then make sure you add the Facebook page to your bookmarks.
So have you added the Facebook button to your page? or will you do so now? Leave us a comment with your URL and let us know.
Read More...